Note for users of screen readers: letters in parentheses in the instructions below refer to corresponding areas on example images. If you have any questions about these instructions, contact eLearning for assistance.
On this page:
Step 1: Enable Sync and Create Teams Class
To create your Teams Class first you must turn on Microsoft Sync and start Microsoft Sync in Canvas to set up the feature. This must be done in each course that you would like to use Microsoft Class Teams integration.
Note: If you have set up the Teams Meetings integration in this course already skip to the next step.
- Go to Settings (A) in your Canvas course and then select Navigation (B)
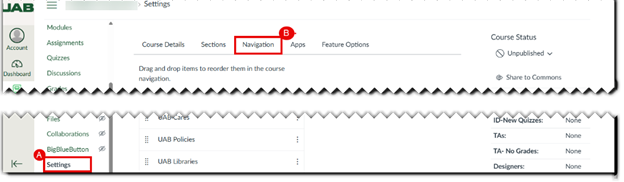
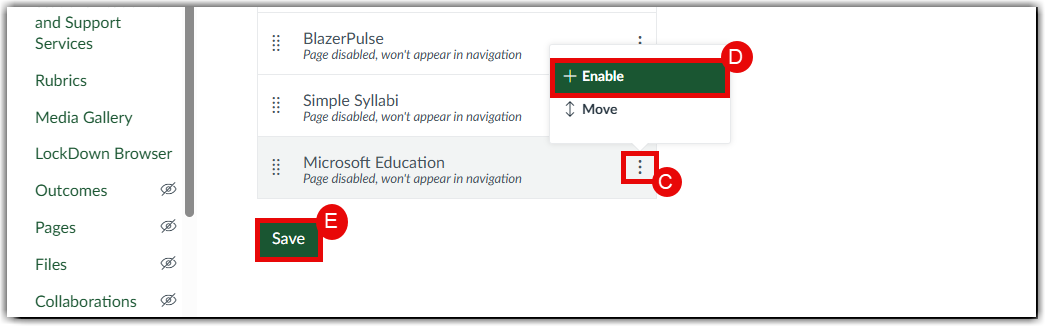
- In the Navigation (B) tab of your course, browse for Microsoft Education (C) and Enable (D) then Save (E) those Settings.
- Under Integrations (B), click the toggle under State (C). The toggle will turn green with a check mark as shown. Next, click the arrow beside Microsoft Sync (D) to expand the menu.
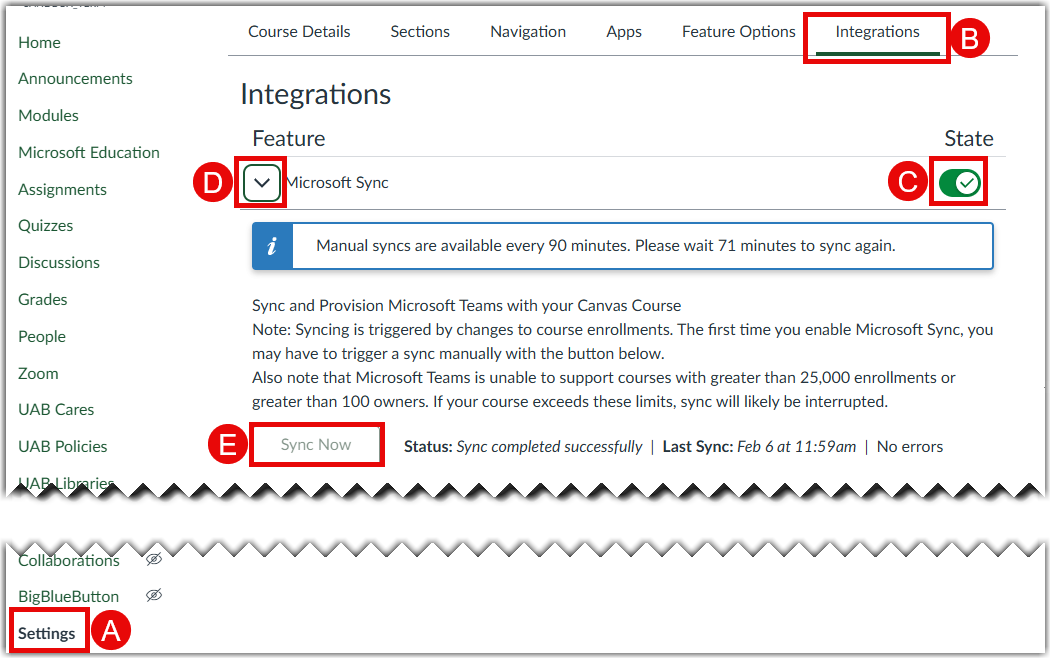
- Click Sync Now (E) to create a Microsoft Class Team for the course. The Team creation may take several minutes. The Status will change to Sync manually scheduled.

Note: You do not have to wait on the Sync to complete to perform the next step.
Step 2: Ensure Microsoft Teams Classes is Enabled in Course Navigation
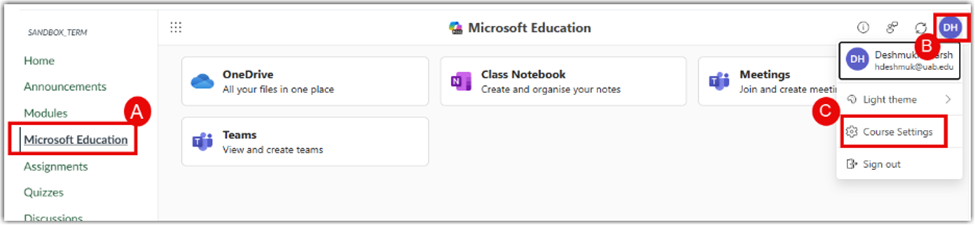
- Select Microsoft Education (A) then click your Profile Icon (B) and select Course Settings (C).
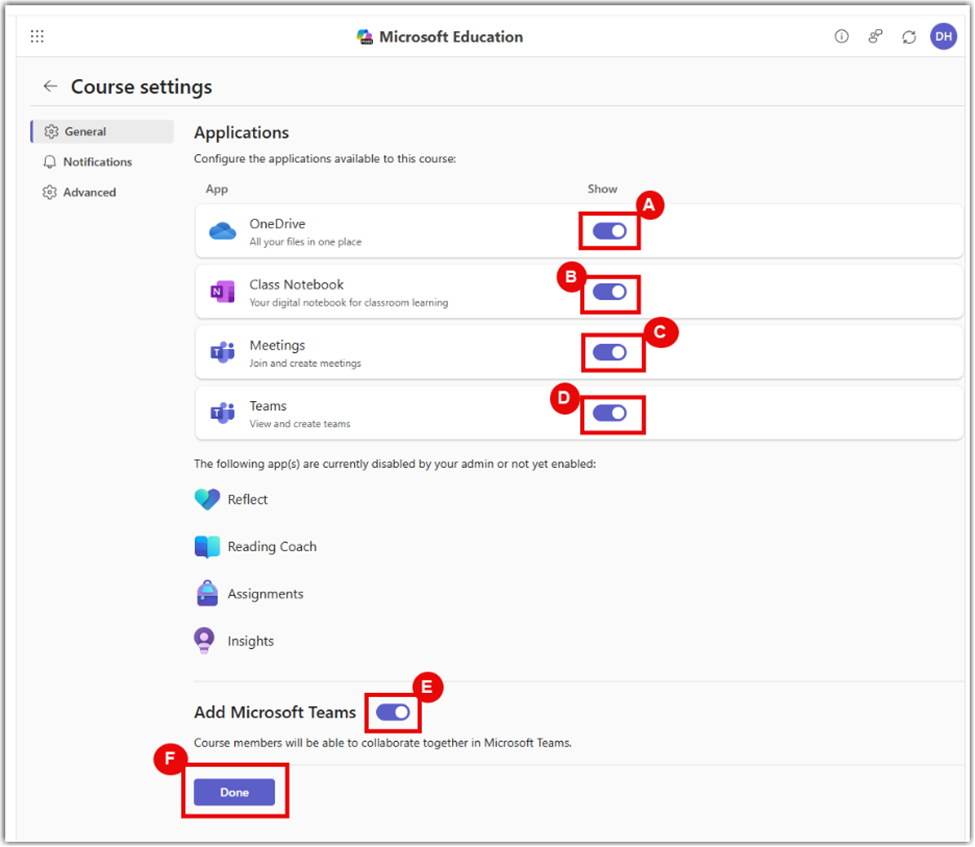
- Make sure Teams (D) and Add Microsoft Teams (E) and all the other features you need are enabled. .
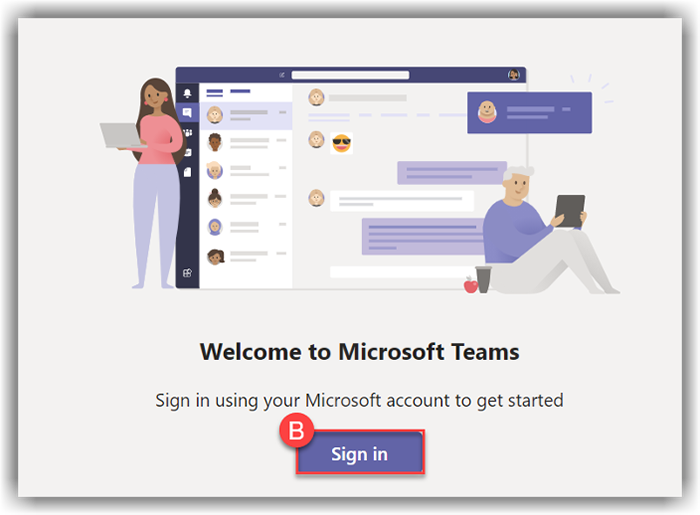
- You may be asked to sign in with your Microsoft Account. If you see this screen, click Sign In (B). Sign in with your UAB email address, you will then be redirected to the UAB sign in.
- Now that Microsoft Teams have been enabled into Microsoft Education and the changes are saved, select Meetings (B) from the Microsoft Education (A) Dashboard.

- To enter a new TeamsGroup, click Open (B) and you can access any teams class that is currently active on your dashboard.

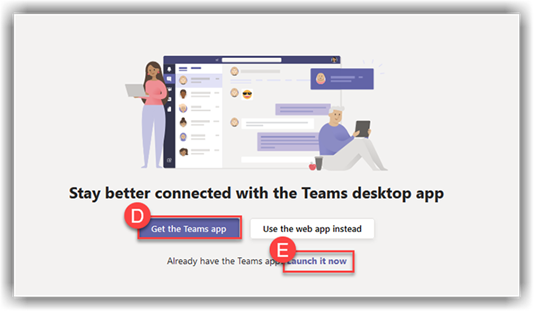
- Another Browser Tab will open, showing the screen below. If you do not have the PC/Mac Microsoft Teams app installed, click Get the Teams app (D) and follow the instructions to install the app or use the web app instead. If you already have Microsoft Teams installed, click Launch it now (E).
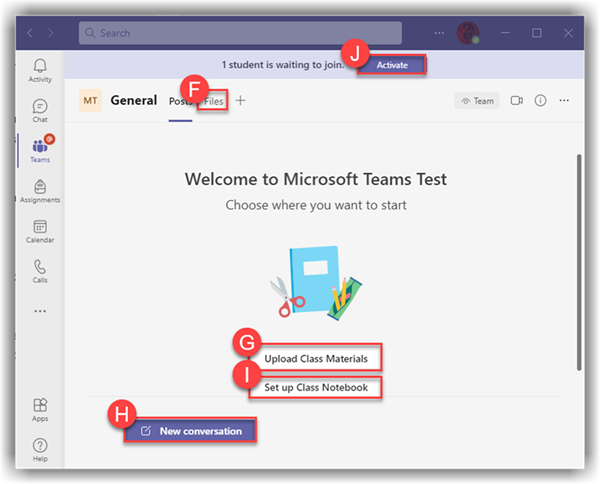
- In your Teams inside of Microsoft Education, there will be a message Welcome to [Your course name] in the center.
Upload resources using the Files (F) tab or Class Materials (G) button.
Start New Conversations (H) with the class.
A OneNote Class Notebook (I) can be created.
Your Class Team and its contents is invisible to students until you Activate the Team.
Press Activate (J) when you are ready for students to have access to the Class Team.