This section covers how to edit or remove an item from your inventory.
Be sure to remove the chemical from inventory when submitting a waste request or once it’s fully used and disposed
1. Click the “Inventory” icon on the home page.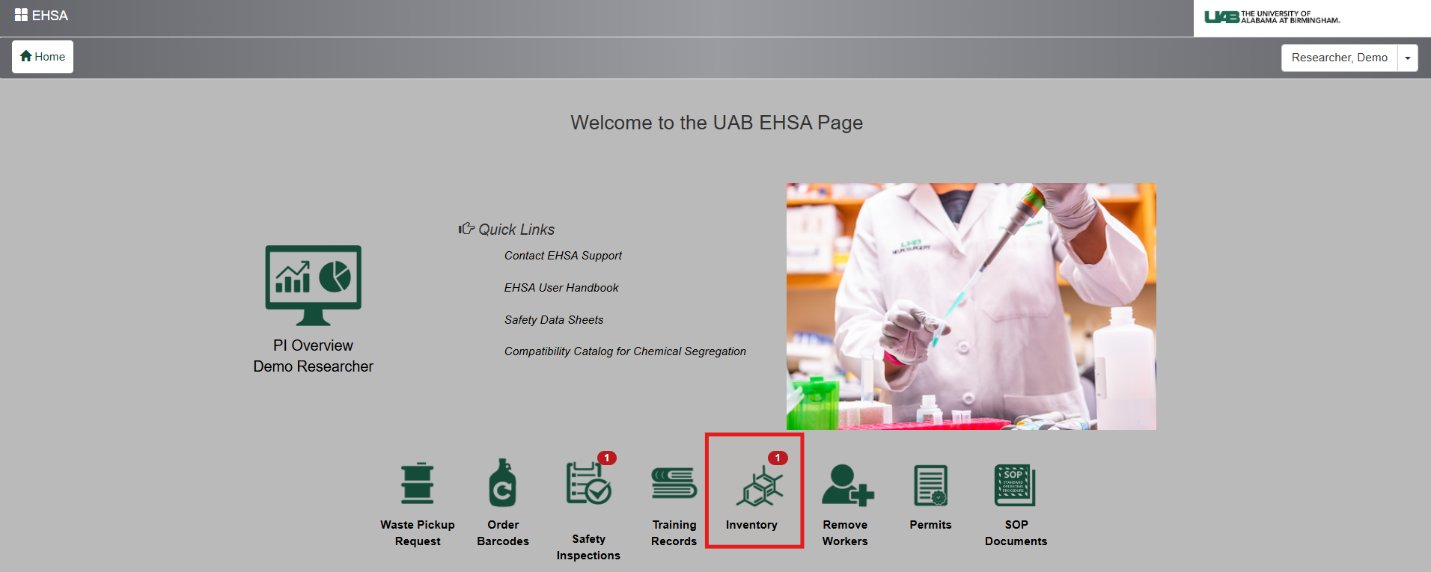
2. Select “Inventory-View/Add" from the Chemical Inventory menu.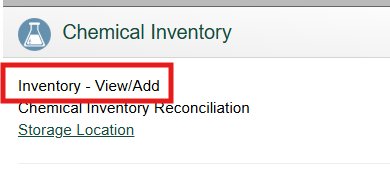
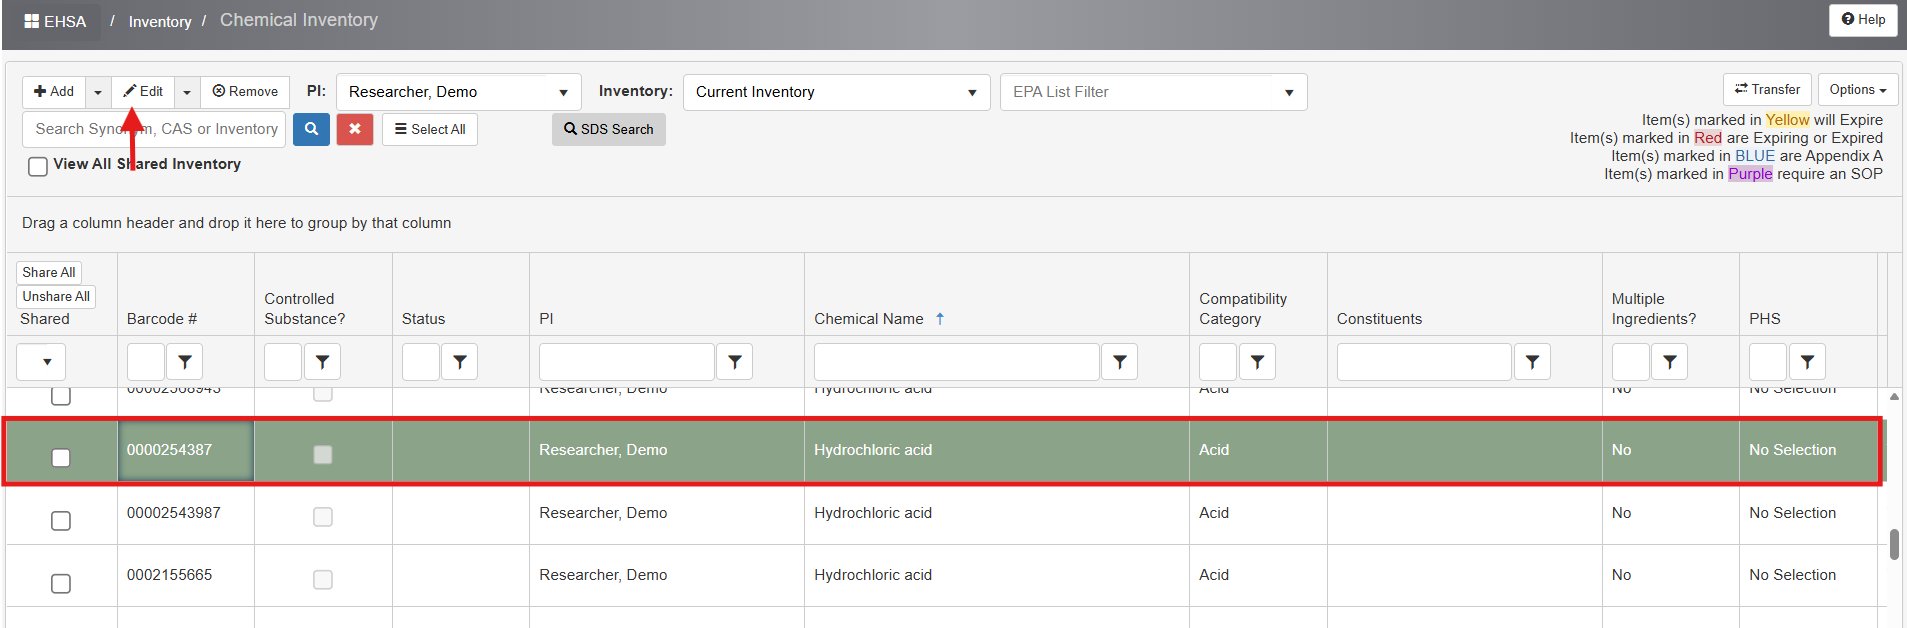
3. Click once on the chemical to highlight it in green for Remove or Edit. Ensure the barcode number is correct before selecting.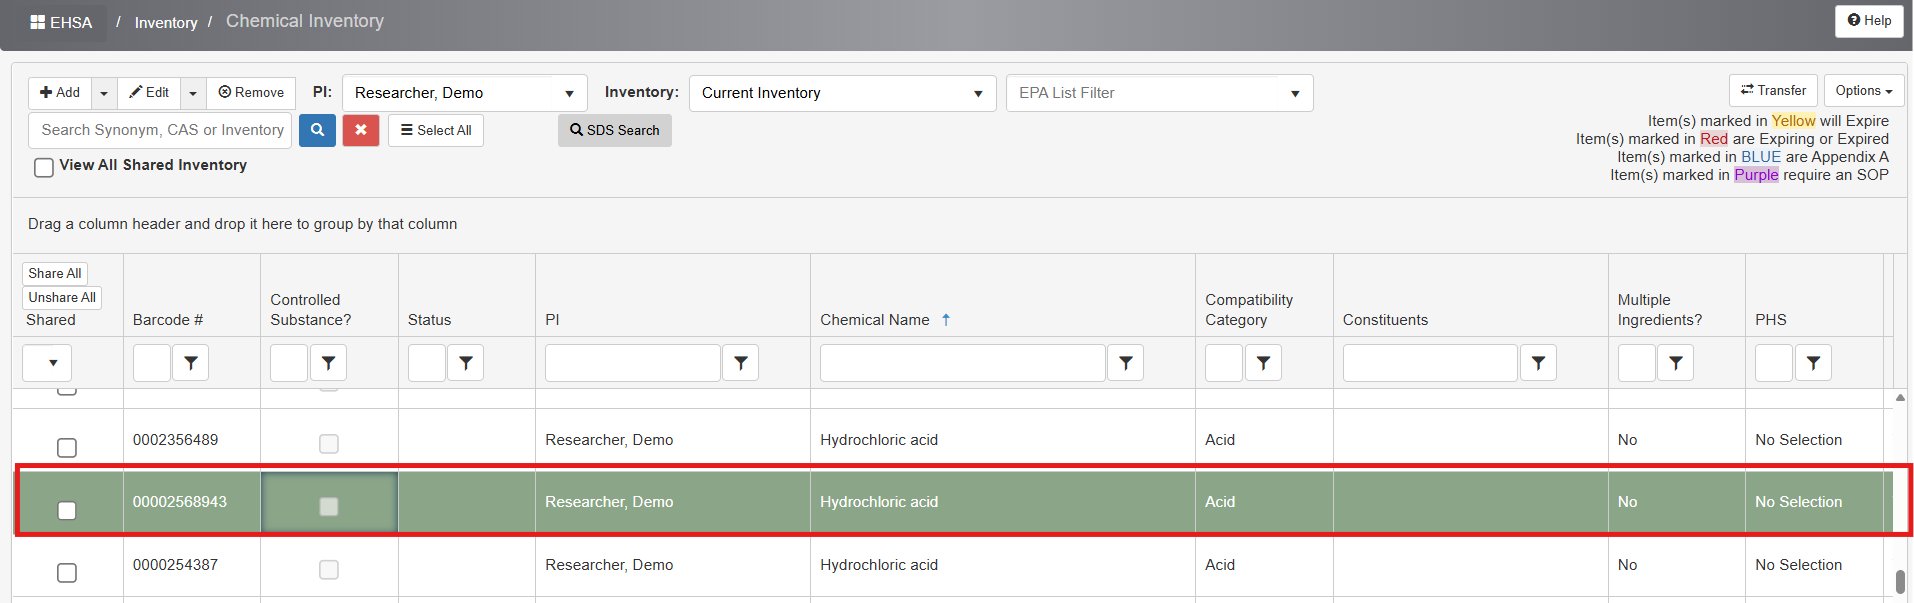
To Remove a Chemical from your Inventory:
1. Click the “Remove” icon located in the top-left corner. A new screen will appear.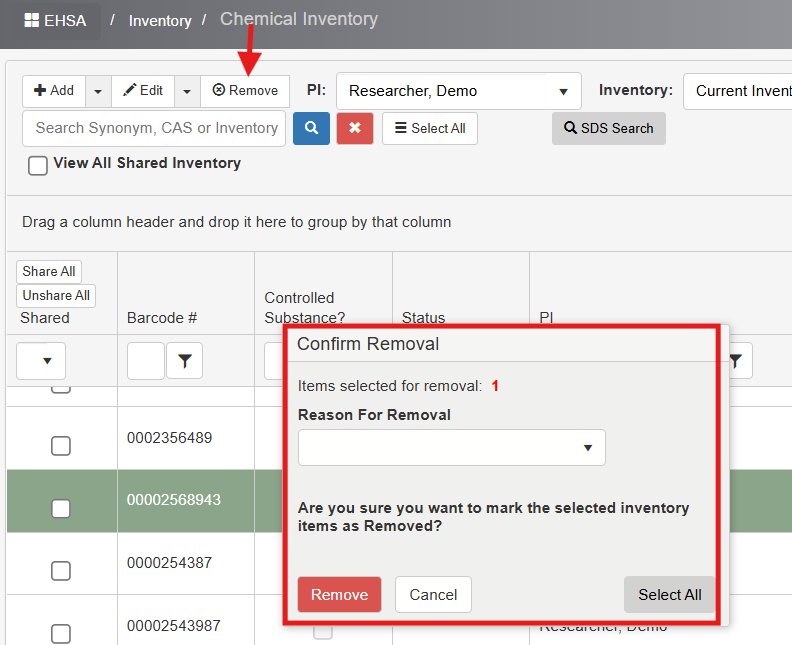
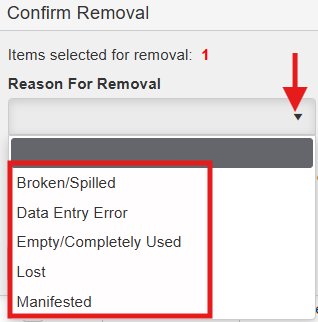
2. Under “Reason for Removal,” select the option that most accurately explains why the item is being removed from your inventory.
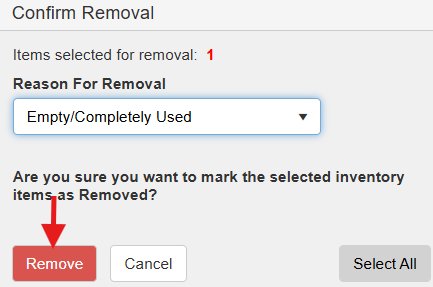
3. Select “Remove” to finalize the process.
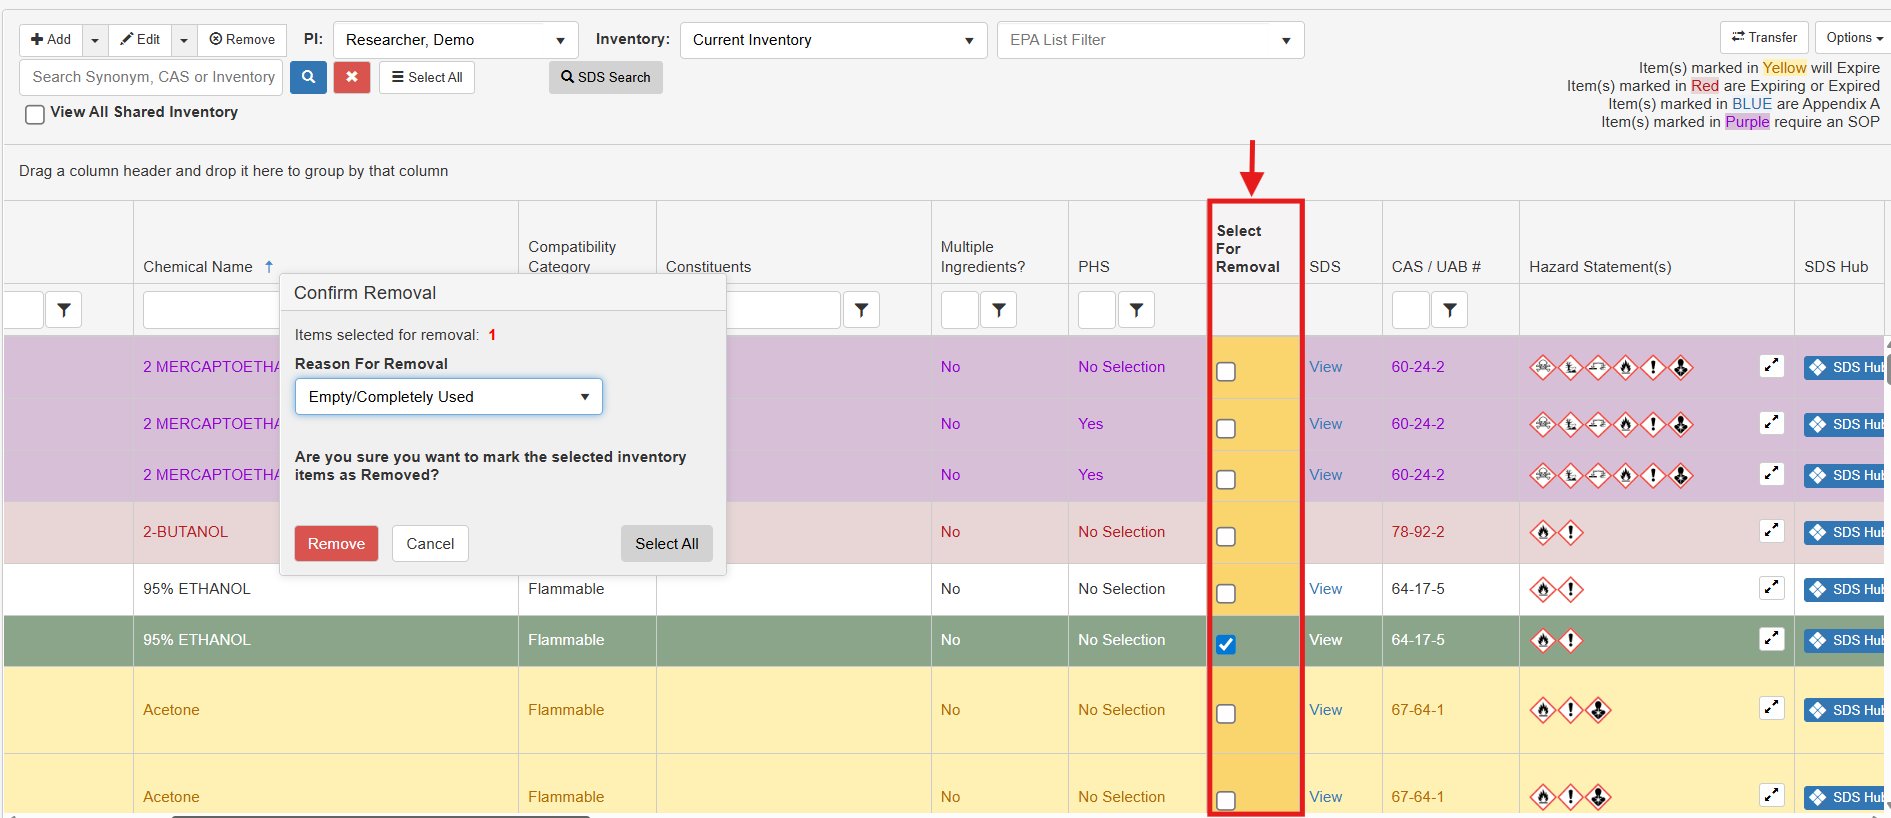
NOTE: If you're removing multiple items at once, use the 'Select for Removal' option with checkboxes. Check the boxes corresponding to the barcode entries you wish to remove, then proceed to remove them in a single action.
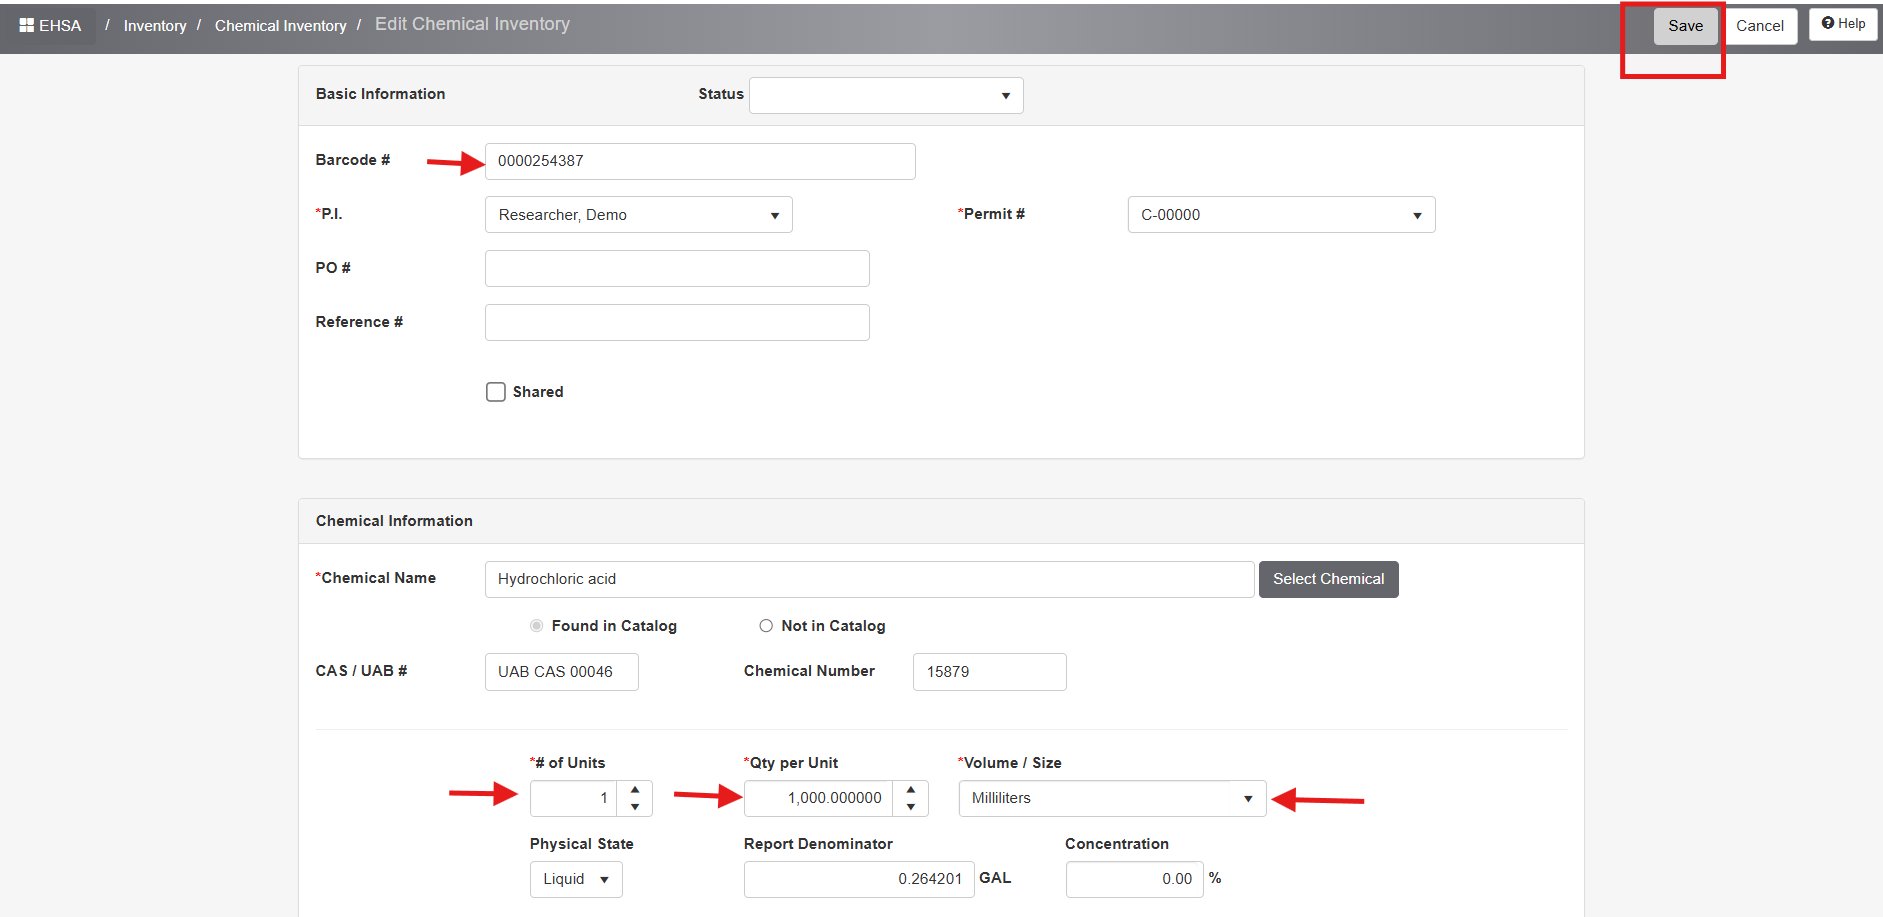
To Correct a Chemical Entry Error:
1. To correct a chemical entry, either double-click the chemical to open the edit screen directly or single-click to highlight it and then click the 'Edit' icon in the top-left corner. A new screen will appear for editing.
2. Review and update all necessary fields, then click “Save” to apply your changes.