As Heersink School of Medicine continues to improve accessibility throughout its digital platforms, it is crucial to know foundational steps for building materials. Before uploading documents onto the website or into courses within learning management systems, there are a few quick steps you can take to ensure efficient use of accessibility features.
PDF Tags
Setting up proper accessibility tagging in PDFs provides a better experience for learners using screen readers. To confirm these tags are set up, please follow the following steps:
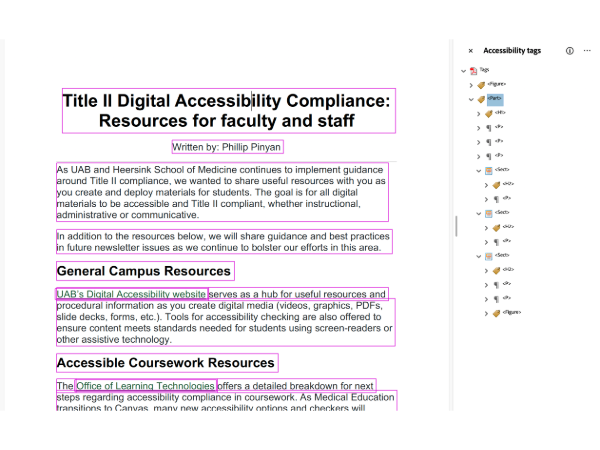
Step 1: Open the Accessibility Tags panel from the top menu in View>Show/Hide>Side Panels>Accessibility tags.

Step 2: In the Accessibility tags panel, select the three-dots menu and Autotag document to populate the PDF with accessibility tags.

Step 3: Click each of the bracketed tags in the Accessibility tags panel to ensure the automatic order of tags matches the flow of document. Screen readers will read in the order of the tags. In the event the tags are out of order, you can click and drag the tag up or down to achieve the correct order.
Step 4: Save your PDF and upload to desired destination.
Accessible PowerPoints
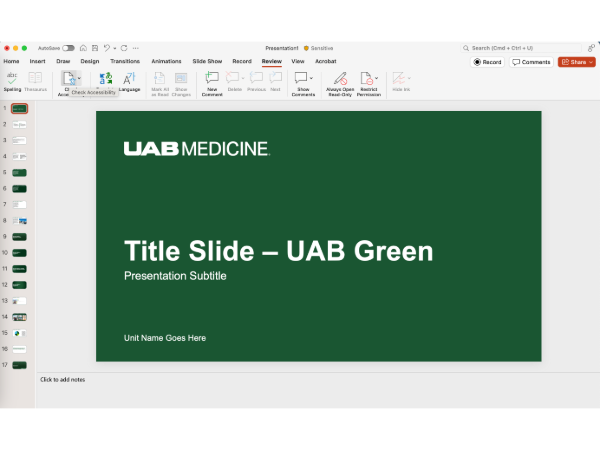
Microsoft PowerPoint is equipped with an Accessibility Assistant, which will review the file for issues to be corrected.
Step 1: Click Check Accessibility under the Review tab.
Step 2: Refer to the Accessibility Assistant panel for items to be addressed.
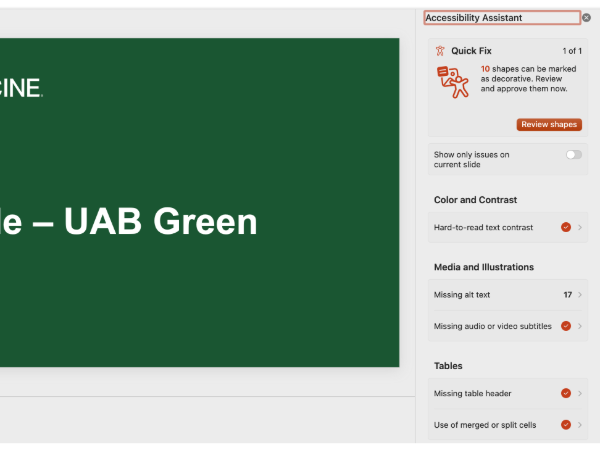
Step 3: Some elements within a PowerPoint will appear to a Screen Reader as an image if not categorized as decorative. In this case, the vertical spacer shape needs to be labeled as decorative, which may be done by selecting all instances and approving the selection.

Step 4: Cycle through the images flagged as not having alt text and enter necessary descriptions. Additional guidance will be forthcoming regarding alt text templates, specifically for use with complex medical imagery.
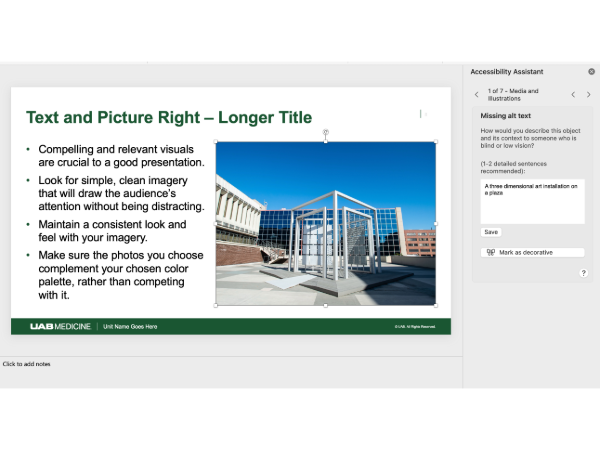
Step 5: Ensure all slides have a title and the PowerPoint reading order is correct.

Step 6: Save and upload to desired destination.